개요
“하나의 컨테이너에는 하나의 책임만 가지고 있어야 한다.”
Kubernetes는 컨테이너를 병렬로 Pod Spec에 명시함으로써 서로 역할을 분리하여 동작하도록 할 수 있다.
이를 통해 비즈니스 로직 이외의 신경쓸 부분을 다른 컨테이너에 맡길 수 있다.
목표
- 컨테이너를 결합할 수 있는 다양한 Kubernete 문법에 대해 학습한다.
- 컨테이너 결합으로 표현할 수 있는 다양한 예제를 학습한다.
여정
초기화 컨테이너

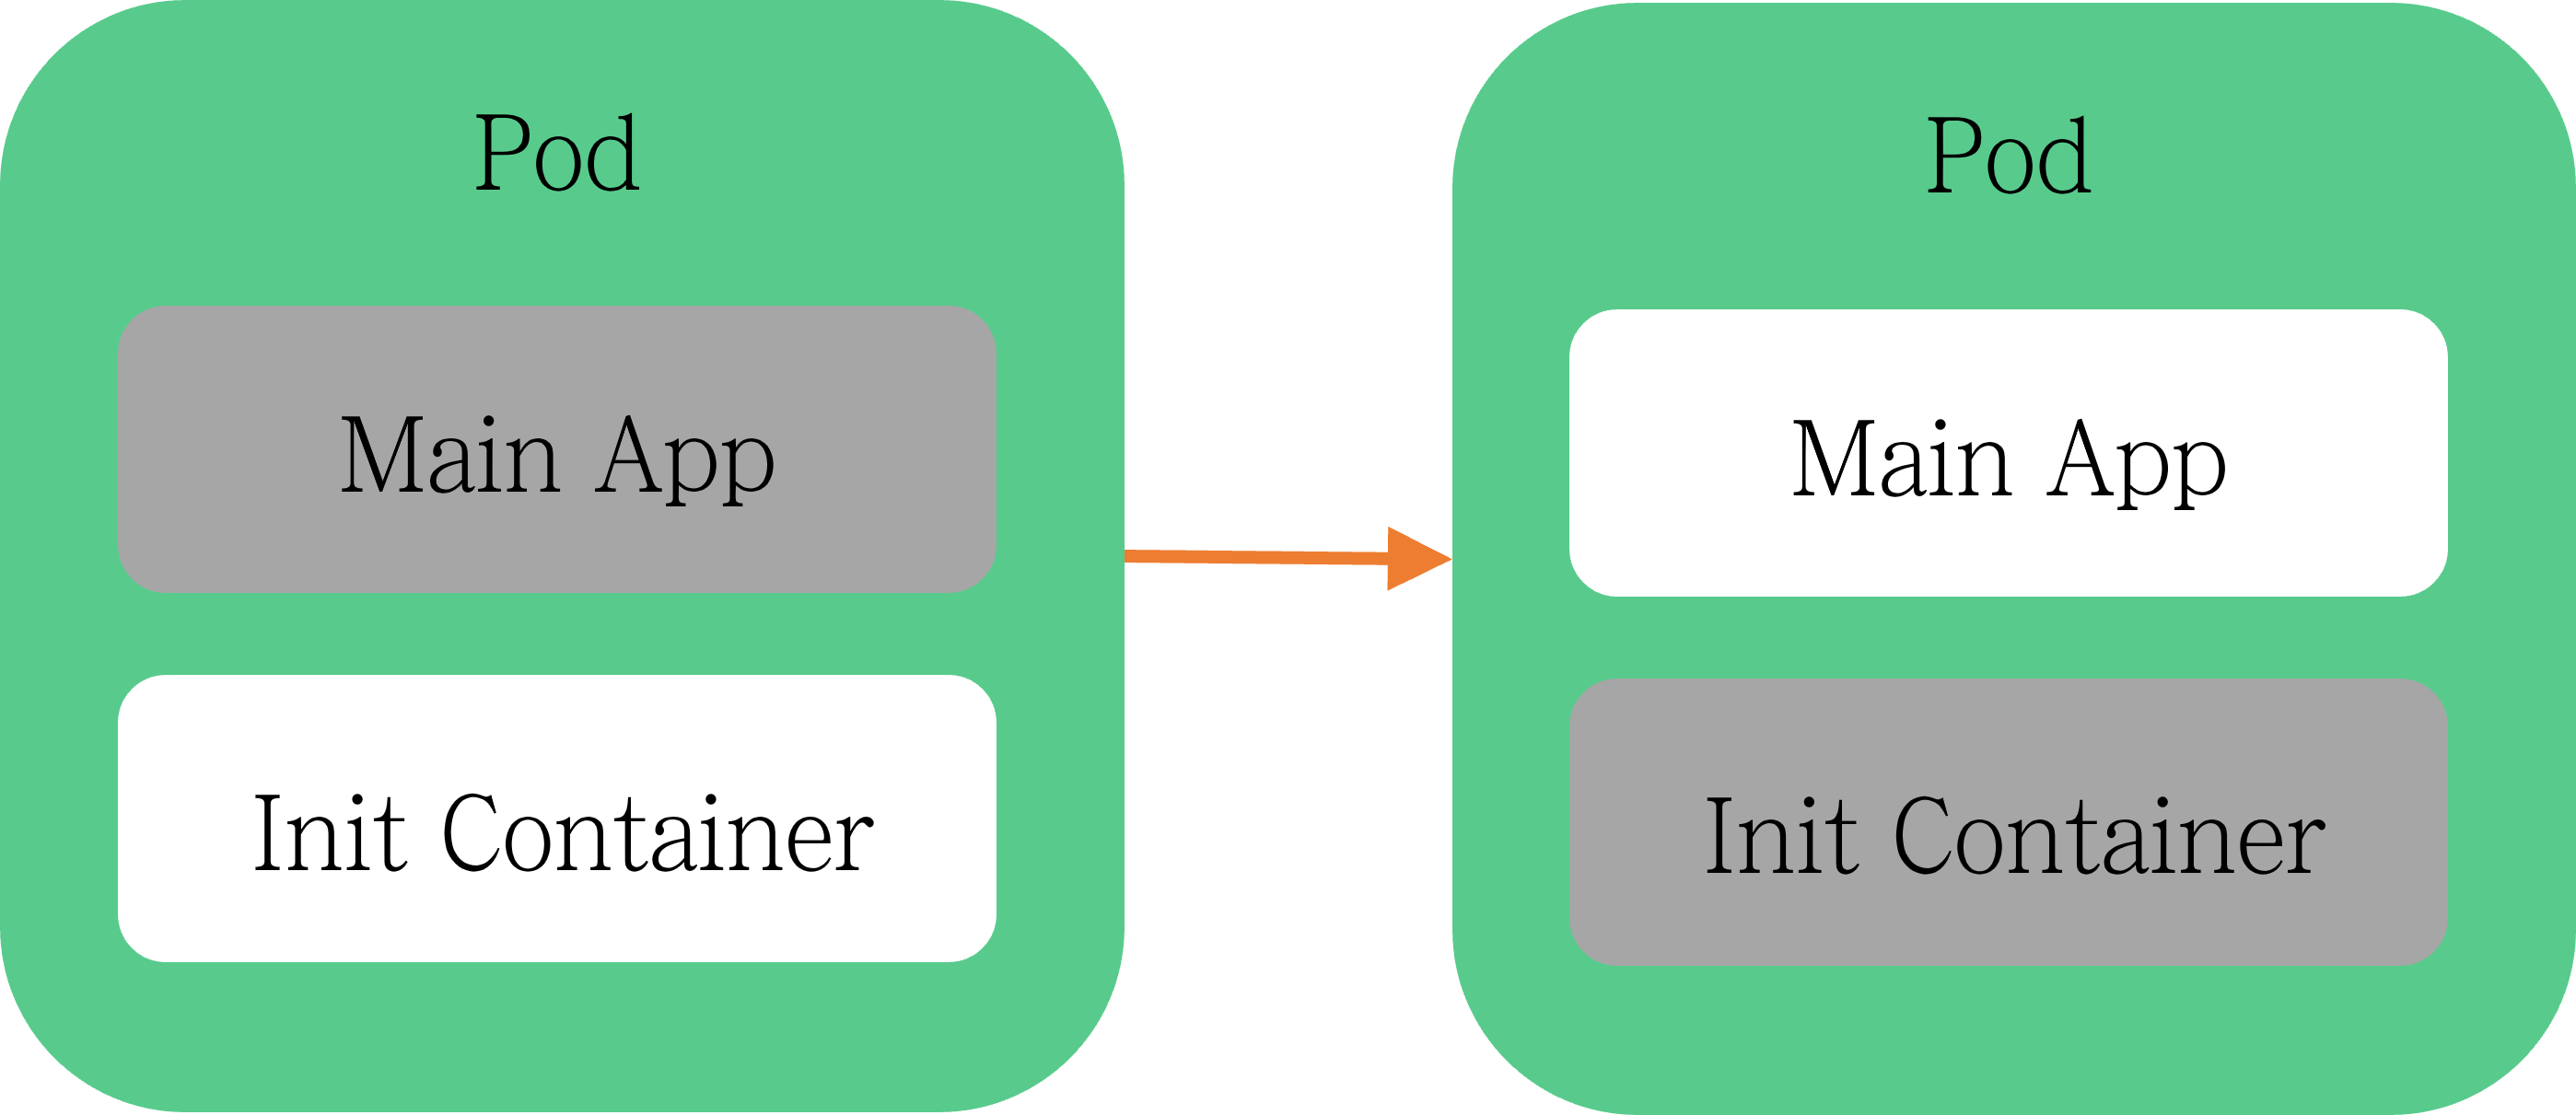
초기화 컨테이너는 Pod의 Application 컨테이너가 실행 전 동작하는 특수한 컨테이너이다.
일반적인 컨테이너와 비슷한 동작을 하지만 다음 두 가지 조건을 달성하기 위해 작성된다.
- 초기화 컨테이너는 항상 완료를 목표로 실행된다.
- 각 초기화 컨테이너는 다음 초기화 컨테이너가 시작 전에 성공적으로 완료되어야 한다.
앱 컨테이너 이미지의 보안성을 떨어뜨릴 수도 있는
유틸리티 혹은 커스텀 코드를 안전하게 실행할 수 있다.
불필요한 툴들을 분리한 채로 유지함으로써
앱 컨테이너 이미지의 공격에 대한 노출을 제한할 수 있다.
다음은 초기화 컨테이너로 할 수 있는 결합의 간단한 예시이다.
유틸리티 코드 포함하기
sed, awk, python, 또는 dig 와 같은 도구를 사용할 수 있게 하는 예제.
# 실행에 필요한 Machine Learning Model을 복사하는 예제
# Model이 담긴 Container에서 관련 설정을 포함하고 있기 때문에
# 어플리케이션에서는 신경쓸 필요가 없어진다.
apiVersion: apps/v1
kind: Deployment
metadata:
  name: ml-demo
spec:
  selector:
    matchLabels:
      app: ml-demo
  replicas: 1
  template:
    metadata:
      labels:
        app: ml-demo
    spec:
      volumes:
      - name: model-volume
        emptyDir: {}
      initContainers:
      - name: model-init
        image: gcr.io/.../doc2vec-model-it:1.0
        imagePullPolicy: Always
        command: ["/bin/sh"]
        args: ["-c", "cp /usr/src/d2v_model/* /models"]
        volumeMounts:
        - name: model-volume
          mountPath: "/models"
      containers:
      - name: ml-demo
        image: gcr.io/.../ml-demo:latest
        imagePullPolicy: Always
        command: ["python", "./main.py"]
        ports:
        - name: faq-engine-port
          containerPort: 8000
        volumeMounts:
        - name: model-volume
          mountPath: /usr/src/app/models
Application 실행 지연하기
myservice와 mydb가 service에 등록된 것이 확인될 때까지 실행을 대기하는 예제
# myservice와 mydb가 service에 등록된 것이 확인될 때까지 실행 대기(nslookup)
apiVersion: v1
kind: Pod
metadata:
  name: myapp-pod
  labels:
    app.kubernetes.io/name: MyApp
spec:
  containers:
  - name: myapp-container
    image: busybox:1.28
    command: ['sh', '-c', 'echo The app is running! && sleep 3600']
  initContainers:
  - name: init-myservice
    image: busybox:1.28
    command: ['sh', '-c', "until nslookup myservice.$(cat /var/run/secrets/kubernetes.io/serviceaccount/namespace).svc.cluster.local; do echo waiting for myservice; sleep 2; done"]
  - name: init-mydb
    image: busybox:1.28
    command: ['sh', '-c', "until nslookup mydb.$(cat /var/run/secrets/kubernetes.io/serviceaccount/namespace).svc.cluster.local; do echo waiting for mydb; sleep 2; done"]
Application 실행 전 환경 설정
어플리케이션 실행 전 디렉토리를 생성하는 초기화 컨테이너
# 어플리케이션 실행 전 디렉토리를 생성하는 초기화 컨테이너
apiVersion: v1
kind: Pod
metadata:
  name: static-web
spec:
  initContainers:
    # an init containers that create directory
    - name: init-create-dir
      image: alpine
      command: ['sh', '-c', 'sleep 5 && echo "creating dir" && mkdir -p opt/log']
      volumeMounts:
        - name: data
          mountPath: /opt
  containers:
    # an app
    - name: app
      image: alpine
      command: ['sh', '-c', 'echo "app is running" && sleep infinity']
      volumeMounts:
        - name: data
          mountPath: /opt
  volumes:
    - name: data
      emptyDir: {}
이러한 초기화 컨테이너는 몇 번이고 재시작, 재시도, 재실행 될 수 있다.
따라서, 몇 번이고 실행해도 동일한 결과를 발생시키는 멱등성 작업을 수행하도록 해야 한다.
ex) EmptyDirs 에 있는 파일에 쓰기를 수행하는 코드 → 출력 파일이 이미 존재할 수 있음
Sidecar 컨테이너

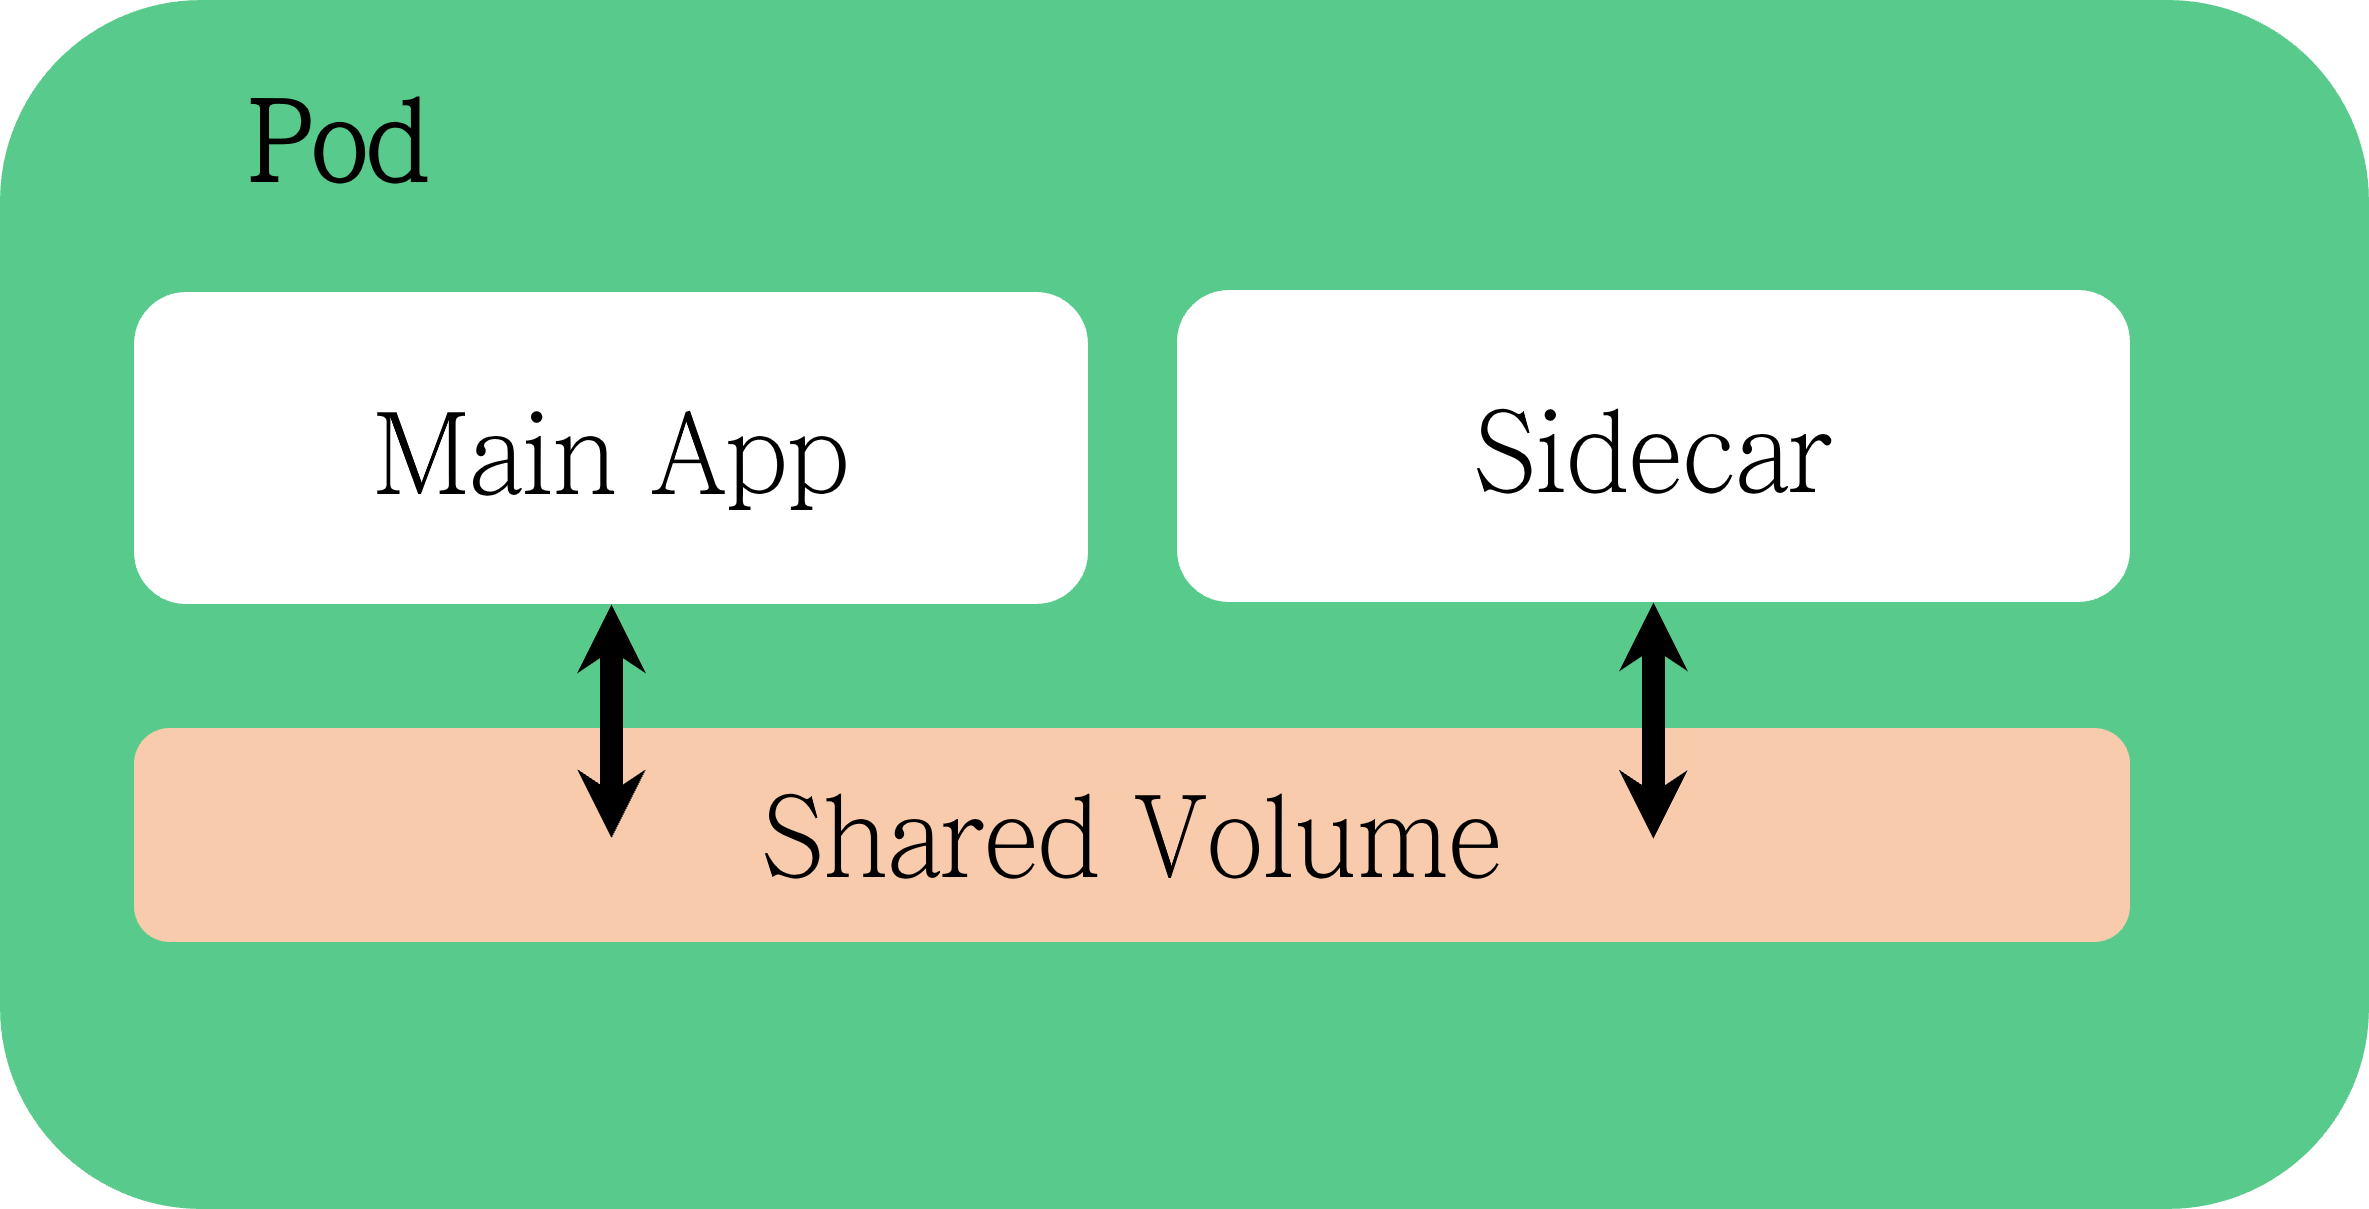
Sidecar 패턴은 애플리케이션의 주요 로직과 별도의 보조 컨테이너(sidecar)를 함께 배치하는 패턴이다.
이렇게 서비스의 특정 부분을 분리하는 구조는
컨테이너에 대해 재사용성과 단일 책임 원칙을 지킬 수 있게 해준다.
즉, 각 컨테이너가 특정 기능을 담당하므로 각 부분을 모듈화하고 재사용할 수 있다.
로그 읽고 쓰기
특정 Pod는 로그를 생성하고, Sidecar Pod는 Log를 읽고 출력한다.
apiVersion: apps/v1
kind: Deployment
metadata:
  name: myapp
  labels:
    app: myapp
spec:
  replicas: 1
  selector:
    matchLabels:
      app: myapp
  template:
    metadata:
      labels:
        app: myapp
    spec:
      containers:
      - name: myapp
        image: alpine:latest
        command: ['sh', '-c', 'echo "logging" > /opt/logs.txt']
        volumeMounts:
          - name: data
            mountPath: /opt
      - name: logshipper
        image: alpine:latest
        command: ['sh', '-c', 'tail /opt/logs.txt']
        volumeMounts:
          - name: data
            mountPath: /opt
  volumes:
    - name: data
      emptyDir: {}
apiVersion: v1
kind: Pod
metadata:
name: simple-webapp
labels:
app: webapp
spec:
containers:
- name: main-application
image: nginx
volumeMounts:
- name: shared-logs
mountPath: /var/log/nginx
- name: sidecar-container
image: busybox
command: ["sh","-c","while true; do cat /var/log/nginx/access.log; sleep 30; done"]
volumeMounts:
- name: shared-logs
mountPath: /var/log/nginx
volumes:
- name: shared-logs
emptyDir: {}
Adapter 패턴
Adapter 패턴은 특정 인터페이스에 맞춰 실제 동작을 Adapter에 위임하는 패턴을 말한다.
Sidecar 패턴에서도 컨테이너를 이용해 이러한 패턴을 구현할 수 있다.
다음은 특정 양식에 맞춰 Log를 출력하는 예제이다.
apiVersion: v1
kind: Pod
metadata:
  name: adapter-container-demo
spec:
  containers:
  - image: busybox
    command: ["/bin/sh"]
    args: ["-c", "while true; do echo $(date -u)'#This is log' >> /var/log/file.log; sleep 5;done"]
    name: main-container
    resources: {}
    volumeMounts:
    - name: var-logs
      mountPath: /var/log
  - image: bbachin1/adapter-node-server
    name: adapter-container
    imagePullPolicy: Always
    resources: {}
    ports:
      - containerPort: 3080
    volumeMounts:
    - name: var-logs
      mountPath: /var/log
  dnsPolicy: Default
  volumes:
  - name: var-logs
    emptyDir: {}
Fluent 로그 전송 (심화)
Fluentd, Fluentbit 등 Logging 아키텍쳐가 사용하는 인터페이스에 맞춰 구현할 수도 있다.
apiVersion: v1
kind: Pod
metadata:
  name: counter
spec:
  containers:
  - name: count
    image: busybox
    command: ["/bin/sh", "-c"]
    args:
    - >
      i=0;
      while true;
      do
        # Write two log files along with the date and a counter
        # every second
        echo "$i: $(date)" >> /var/log/1.log;
        echo "$(date) INFO $i" >> /var/log/2.log;
        i=$((i+1));
        sleep 1;
      done
    # Mount the log directory /var/log using a volume
    volumeMounts:
    - name: varlog
      mountPath: /var/log
  - name: logging-agent
    image: lrakai/fluentd-s3:latest
    env:
    - name: FLUENTD_ARGS
      value: -c /fluentd/etc/fluent.conf
    # Mount the log directory /var/log using a volume
    # and the config file
    volumeMounts:
    - name: varlog
      mountPath: /var/log
    - name: config-volume
      mountPath: /fluentd/etc
  # Declare volumes for log directory and ConfigMap
  volumes:
  - name: varlog
    emptyDir: {}
  - name: config-volume
    configMap:
      name: fluentd-config
---
apiVersion: v1
kind: ConfigMap
metadata:
  name: fluentd-config
data:
  fluent.conf: |
    # First log source (tailing a file at /var/log/1.log)
    <source>
      @type tail
      format none
      path /var/log/1.log
      pos_file /var/log/1.log.pos
      tag count.format1
    </source>


    # Second log source (tailing a file at /var/log/2.log)
    <source>
      @type tail
      format none
      path /var/log/2.log
      pos_file /var/log/2.log.pos
      tag count.format2
    </source>


    # S3 output configuration (Store files every minute in the bucket's logs/ folder)
    <match **>
      @type s3

      aws_key_id <YOUR_AWS_ACCESS_KEY_ID>
      aws_sec_key <YOUR_AWS_SECRET_ACCESS_KEY>
      s3_bucket <YOUR_S3_BUCKET_NAME>
      s3_region <YOUR_S3_BUCKET_REGION>
      path logs/
      buffer_path /var/log/
      store_as text
      time_slice_format %Y%m%d%H%M
      time_slice_wait 1m

      <instance_profile_credentials>
      </instance_profile_credentials>
    </match>
주기적으로 Git Repo Clone
특정 Git Repository를 지속적으로 Clone하는 예제
Airflow와 같이 다양한 Plugin을 사용하는 어플리케이션에 사용할 수 있다.
apiVersion: v1
kind: Pod
metadata:
  name: app-with-git-sync
spec:
  containers:
  - name: busybox
    image: busybox
    command: ['sh', '-c', 'echo The app is running! && sleep 3600']
    volumeMounts:
    - name: gitsync
      mountPath: /git
  - name: git-sync
    image: k8s.gcr.io/git-sync:v4.2
    env:
    - name: GIT_SYNC_REPO
      value: https://github.com/xxx/yyy.git
    - name: GIT_SYNC_BRANCH
      value: main
    - name: GIT_SYNC_ROOT
      value: "/git"
    volumeMounts:
    - name: gitsync
      mountPath: /git
  restartPolicy: Never

  volumes:
  - name: gitsync
    emptyDir: {}
Ambassador 컨테이너

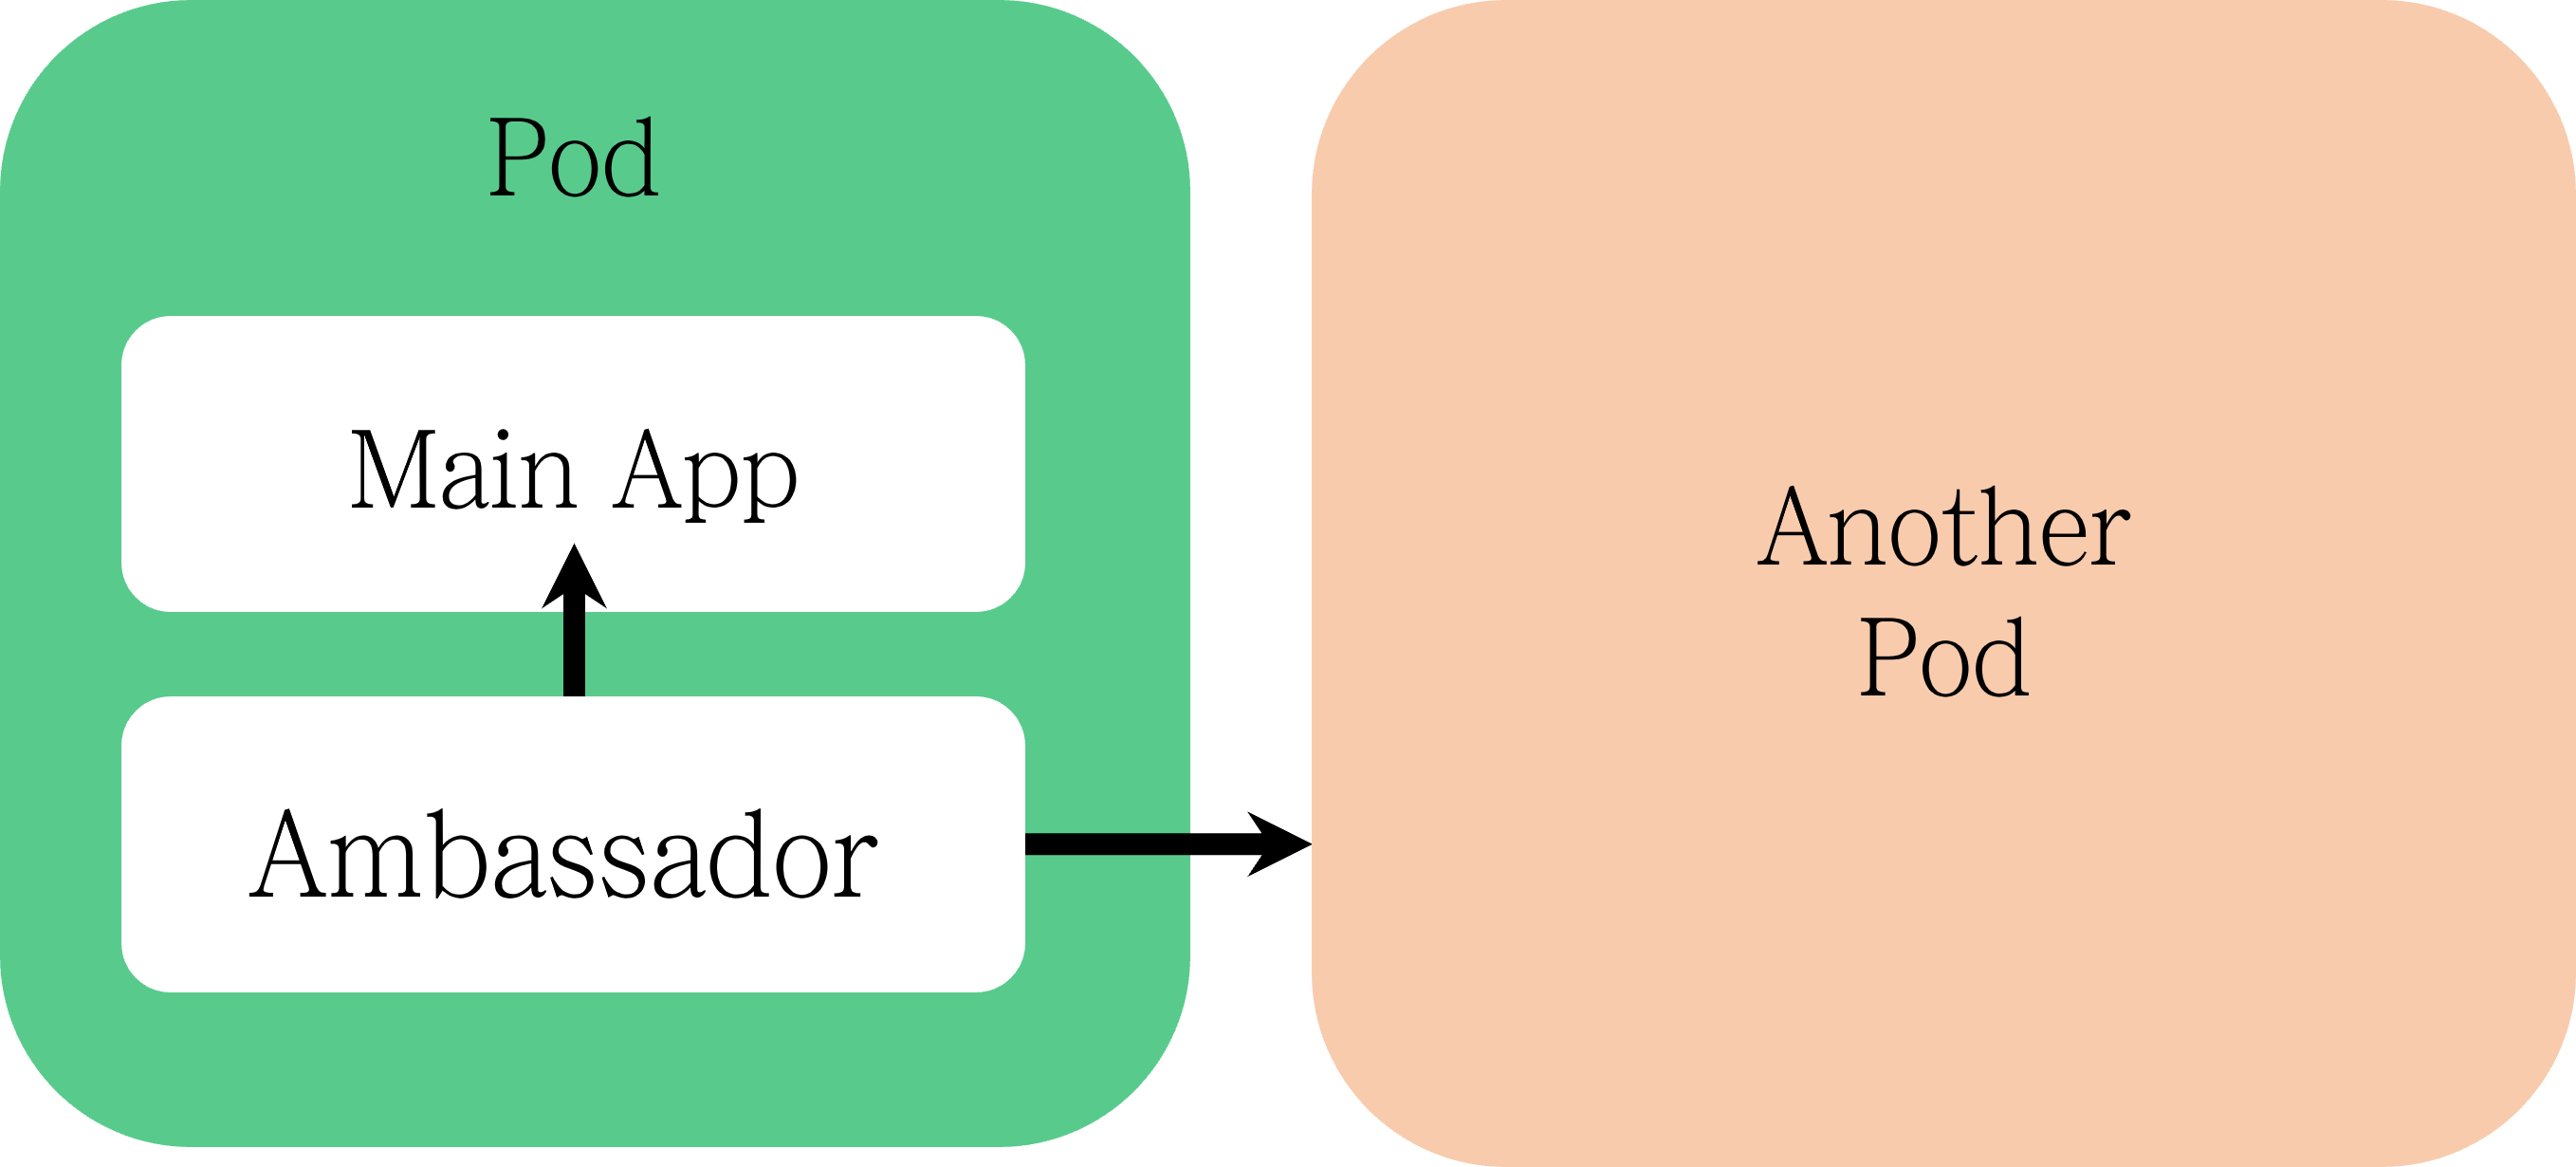
Ambassador 컨테이너는 Application 대신 외부와 통신하며 네트워크 관련 기능을 담당해주는 컨테이너이다.
여기서 네트워크 관련 기능이라고 하면, 다음과 같다.
- 프록시(Proxy) 기능
- 보안 기능(Header 검사, 권한 확인)
- 재시도 및 오류 처리
- 프로토콜 변환 등등
이와 관련해서는 Ingress나 Istio 등 비슷한 개념을 다루고 수행하는 어플리케이션 들이 있으므로 비교하여 찾아보면 좋다.
Redis Proxy 예제
apiVersion: v1
kind: Pod
metadata:
  name: ambassador-example
spec:
  containers:
  - name: redis-client
    image: redis
  - name: ambassador
    image: malexer/twemproxy
    env:
    - name: REDIS_SERVERS
      value: redis-st-0.redis-svc.default.svc.cluster.local:6379:1 redis-st-1.redis-svc.default.svc.cluster.local:6379:1
    ports:
    - containerPort: 6380
마무리
지금까지 컨테이너를 조합하여 단일 책임 원칙을 지킬 수 있는 컨테이너 조합에 대해 알아보았다.
이를 잘 활용한다면 어플리케이션은 비즈니스 로직만 수행하고,
보안, 네트워크, 스토리지 등 기타 설정은 플랫폼에 맡길 수 있게 된다.
참고자료
멀티 컨테이너 파드의 대표적인 디자인 패턴들 (seongjin.me)
Sidecar Container: What is it and How to use it (Examples) (kodekloud.com)
Kubernetes Sidecar Container - Best Practices and Examples (spacelift.io)
'DevOps' 카테고리의 다른 글
| [다.인.서] Dive into Service Mesh | Service Mesh의 구성 요소와 동작 과정 (1) | 2024.05.25 |
|---|---|
| [다.인.서] Dive into Service Mesh | Cloud Native와 Service Mesh (0) | 2024.05.12 |
| [쿠.짤] 쿠버네티스 짤팁 | Pod 배치는 신중하게! (Schedule Process와 Affinity) (2) | 2024.01.14 |
| [쿠.짤] 쿠버네티스 짤팁 | 정상 상태와 수명 주기를 이해하자! (Probe와 SIGKILL) (2) | 2024.01.06 |
| [쿠.짤] 쿠버네티스 짤팁 | KinD로 Local Kubernetes 구축하기 (0) | 2024.01.03 |

